Tag Archives: open source

Speaking “Pyt-knap” / “Never mind button”

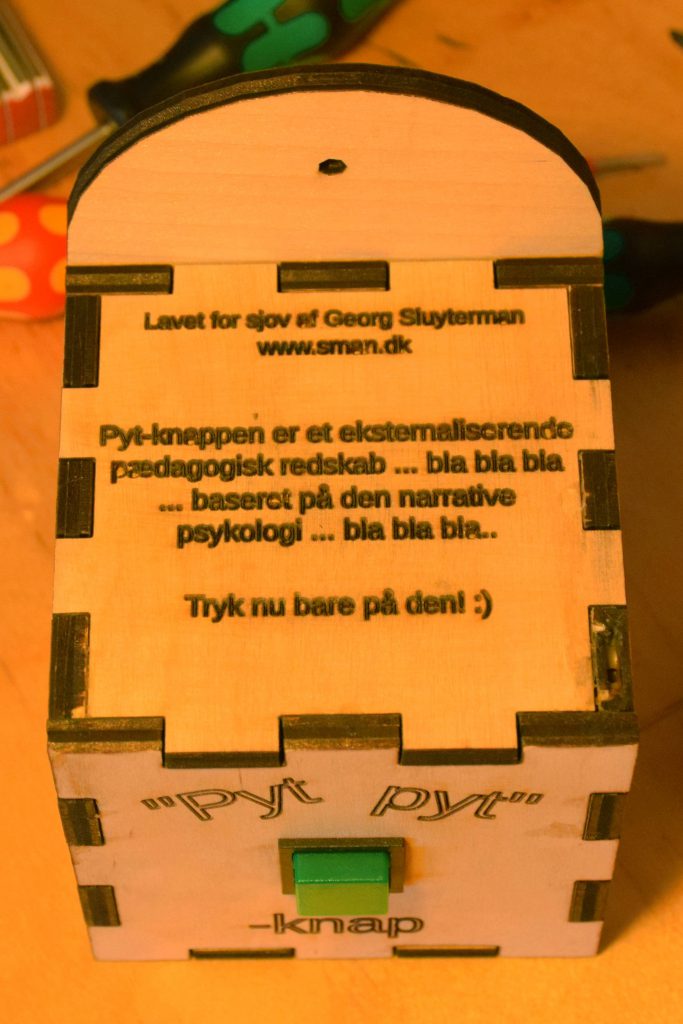
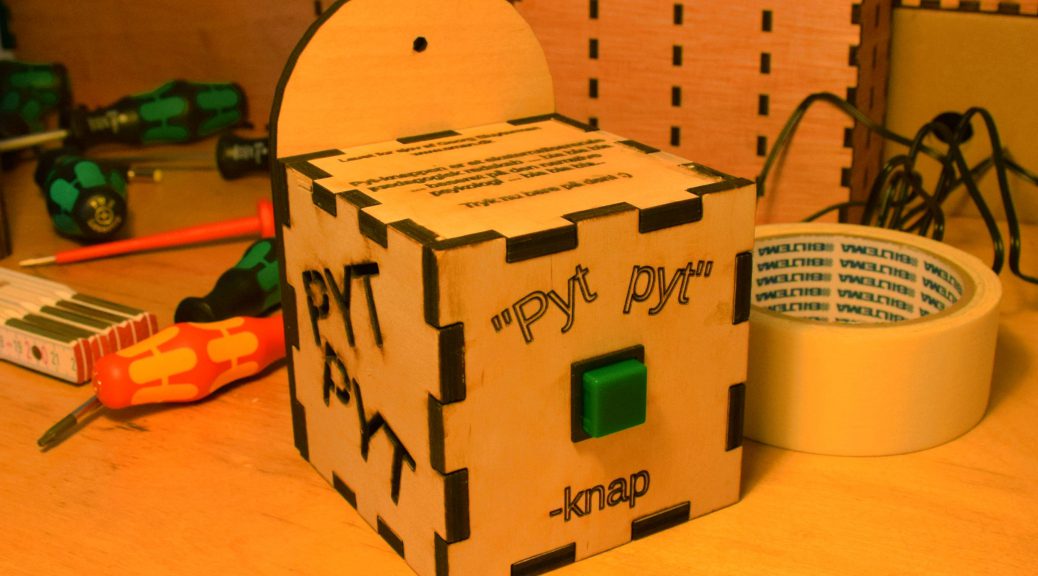
A woman working in a kindergarten told me about a button they had for the kids. Whenever there was some dispute between some kids, an adult could ask them to press the button, in order to easen the kids ability to act by the meaning of the danish word “pyt” (meaning something along the words “never mind”).

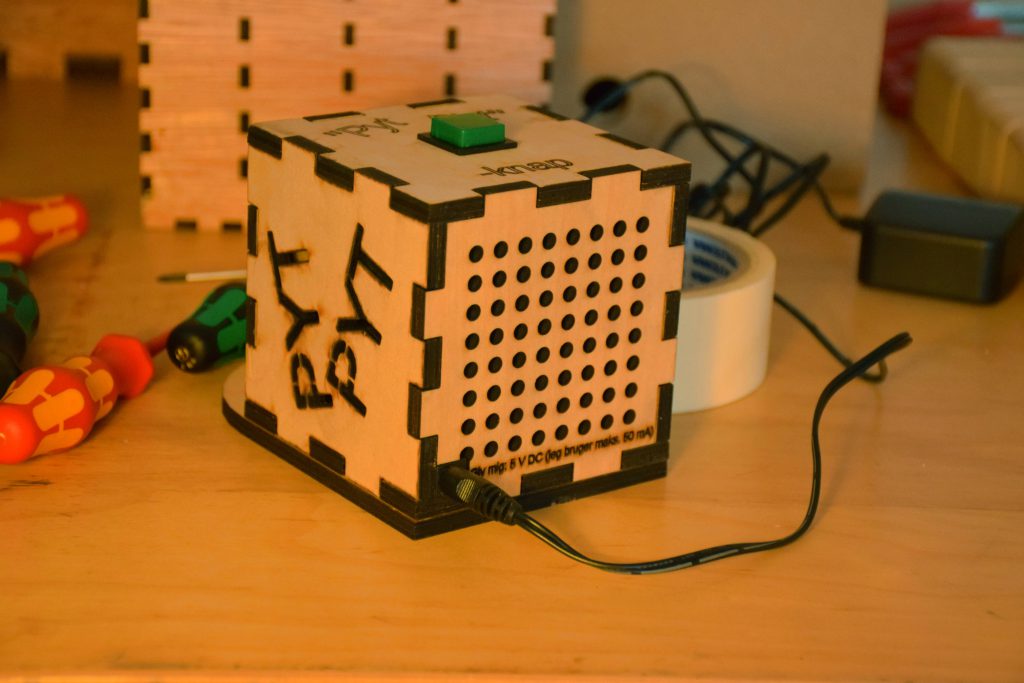
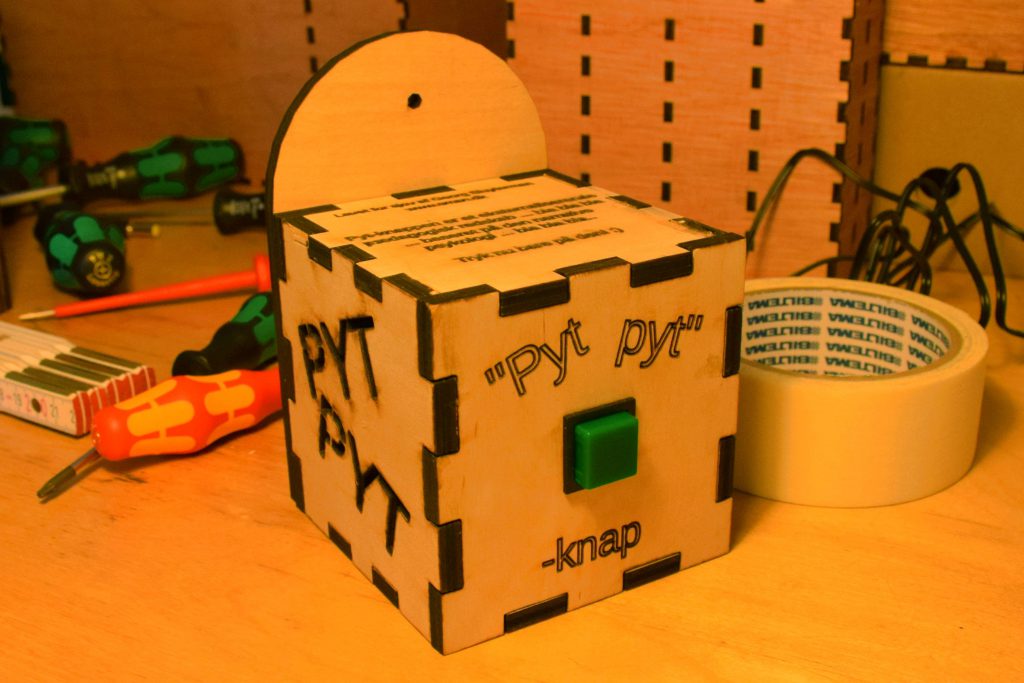
However it turned out turned out the button was not a button after all but just a sticker! I thought the idea behind the so called “button” and the usage of it was fun, so I decided to make one for the kindergarten.

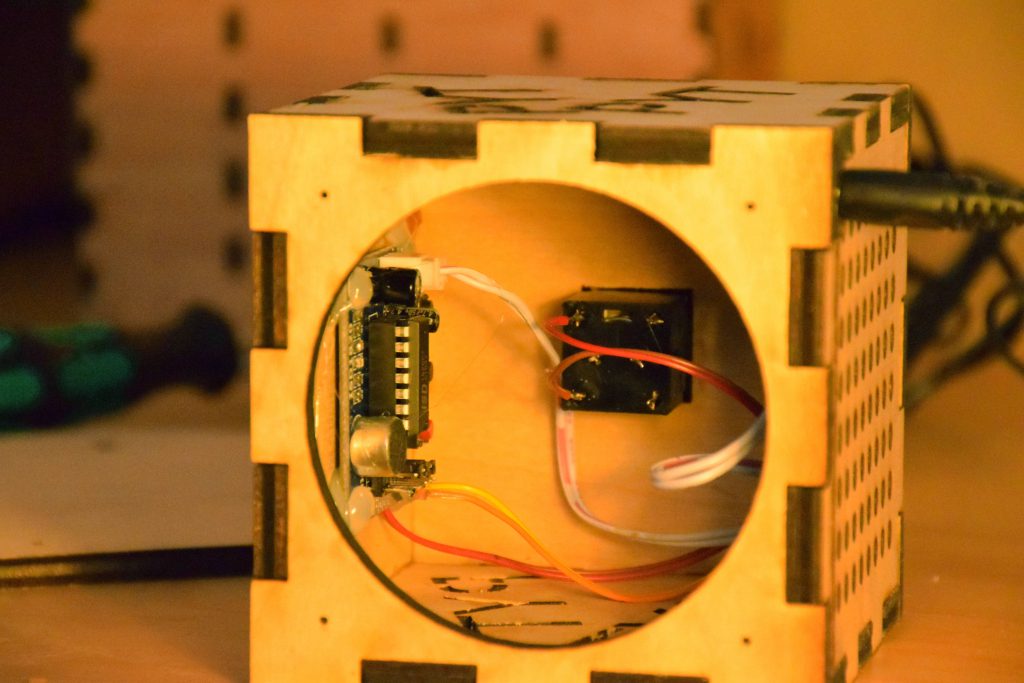
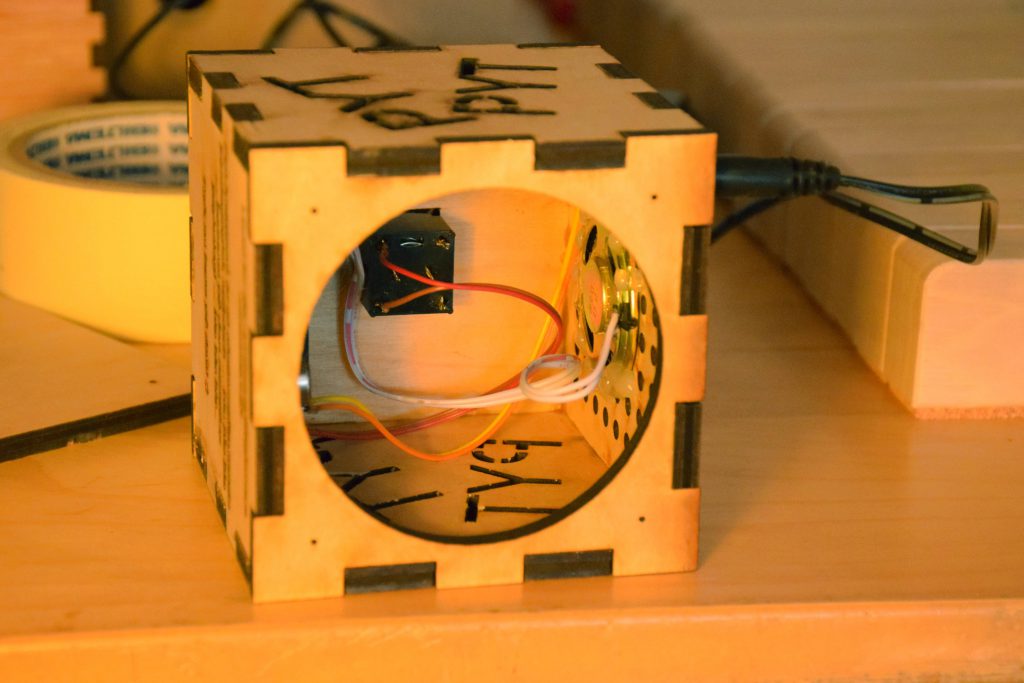
The solution was straight forward: Make a little box with a laser cutter, an isd1820, a button, a dc plug for the case, a lot of hot snot glue and a 5 V power supply. The box is made of 6 mm ply wood and measures 9x9x9 cm. The hole on the back is covered by the back plate where the screw in the wall is screwed in. To finish it all up I gave it two layers of varnish. If you want to build one your self, the OpenSCAD file is available here and an SVG is available here (the green color in the SVG should only be engraved).

If I later on get a picture or a small video clip of the button in use in the kindergarten, I will update this post.

Pyt knap

Solder fume lamp

DSC_0011

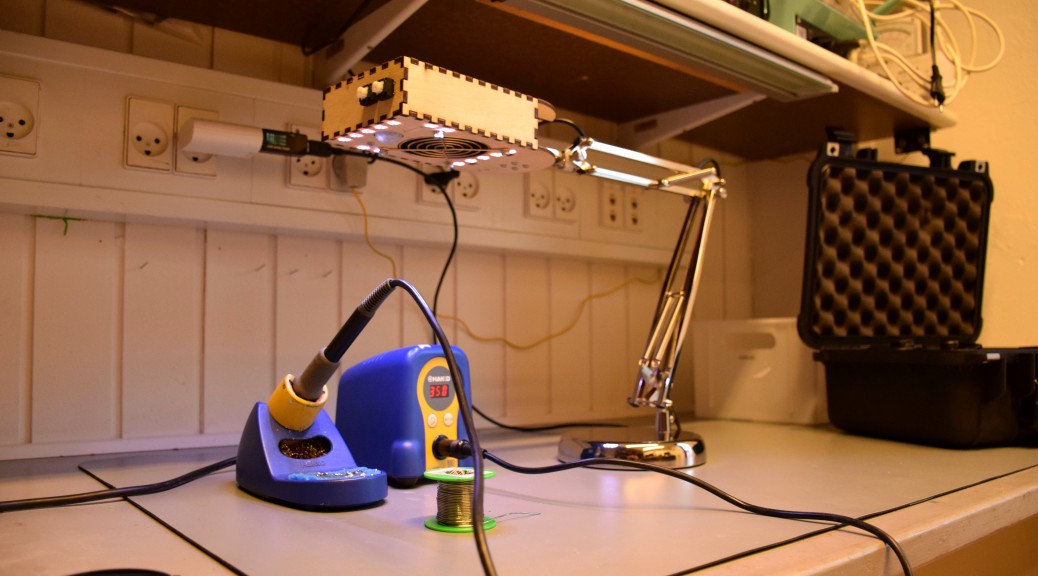
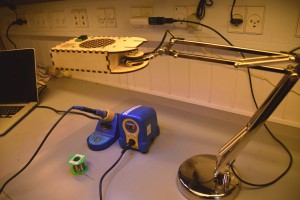
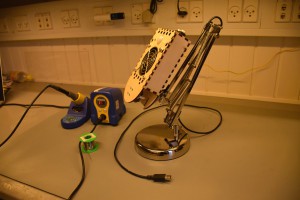
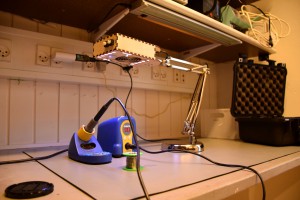
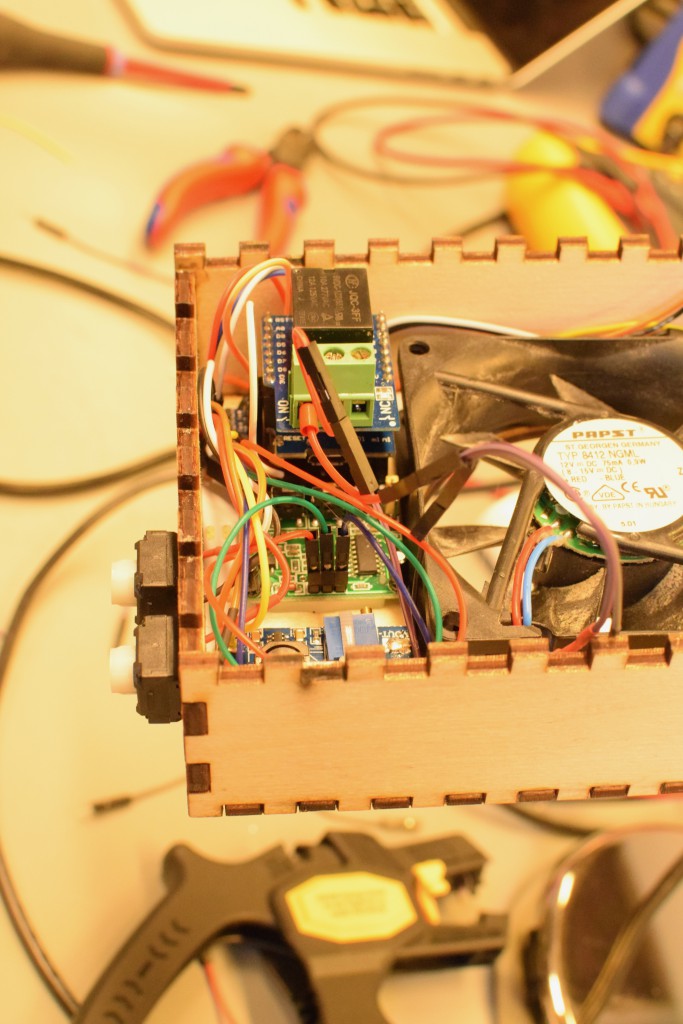
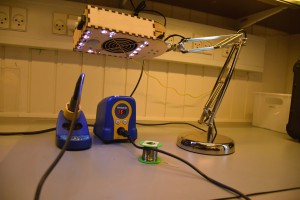
I needed something to remove the smoke when soldering and build this USB powered solder fume fan lamp with an ESP8266 arduino, WS2812b/Neopixels, a fan with an active coal filter and a PIR sensor.

Scad/svg files are available on Thingiverse.

The case is lasercutted in 4 mm plywood.

When there is no movement beneath the lamp the fan turns off after e.g. 60 seconds (can be extended to e.g. 1800 when holding down the fan button) and the LED turns off after 1800 seconds of inactivity. The LED intensity can be dimmed by holding down the LED button.

DSC_0010Parts list:
* 4 mm plywood for the laser cutted case
* Ikea ForsĂĄ lamp ( https://www.ikea.com/us/en/catalog/products/80146777/ )
* WS2812b / Neopixel strip (30 LED/m, 12 LED’s are used for the lamp. I bought it on Ali Express)
* Level shifter from 3.3 V to 5 V for the 3.3 V output from the PIR sensor (https://www.adafruit.com/product/757 I bougt it on AliExpress)
* 1.5 mF capacitor betwen +5 V and ground near the Neopixels, for evening out voltage drops and ripple from the USB power.
* PIR sensor (https://www.adafruit.com/product/189 I bought it on AliExpress)
* Fan (80 mm, 12 V. It was just laying around)
* Wemos D1 mini (https://www.wemos.cc/product/d1-mini.html)
* Wemos ProtoBoard (https://www.wemos.cc/product/protoboard.html)
* Wemos RelayShield for turning the fan on and off (https://www.wemos.cc/product/relay-shield.html)DSC_0057
* MT3608 DC-DC Step Up Power Module from AliE for the power for the 12 V fan
* Activated coal filter (adjusted the size with a scissor) (https://www.conrad.de/de/aktivkohlefilter-3teilig-toolcraft-79-7201-588546.html i bought it on AliE)
* two push buttons, connecting the pins from the ESP8266 to ground.
* USB cable
* A few strips, pig tail wires, bolt and nuts etc.

DSC_0056

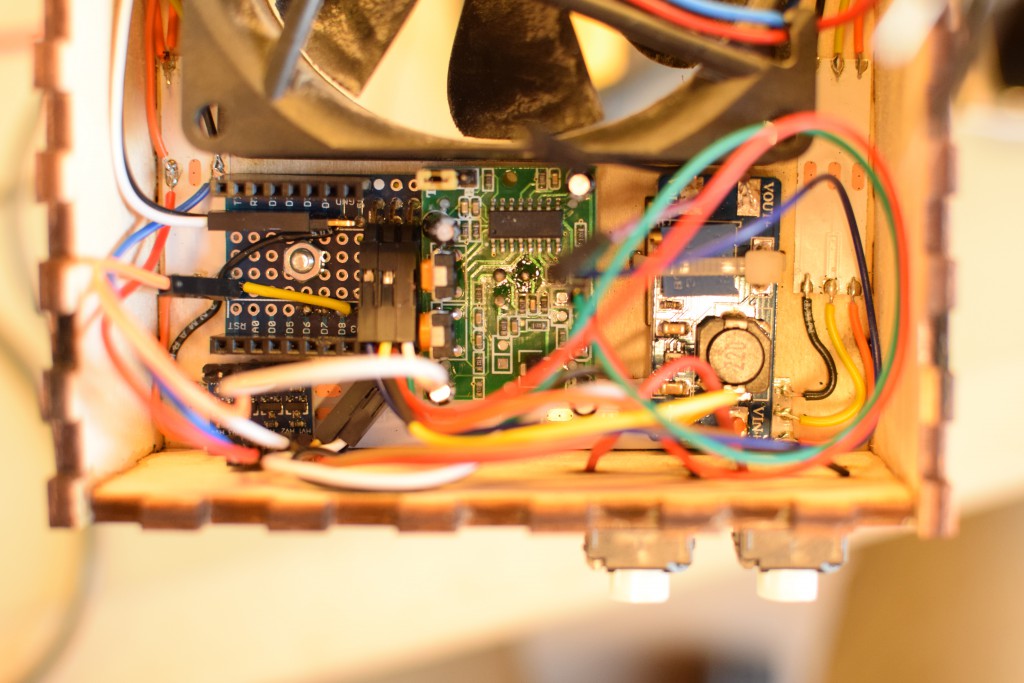
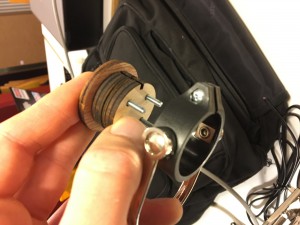
The case is glued together with normal wood glue and the PIR sensor and the WS2812b Neopixel strips are glued against the case with cyanoacrylate. The DC-DC converter is fixed with a cable tie. The Wemos D1 mini is fixed with a small bolt through a drilled hole in the ProtoBoard. The capacitor and the level shifter is glued with a hot glue gun. Be aware that there is very little room for the boards and the wires. If I were to build it again I would make some more room.

DSC_0003
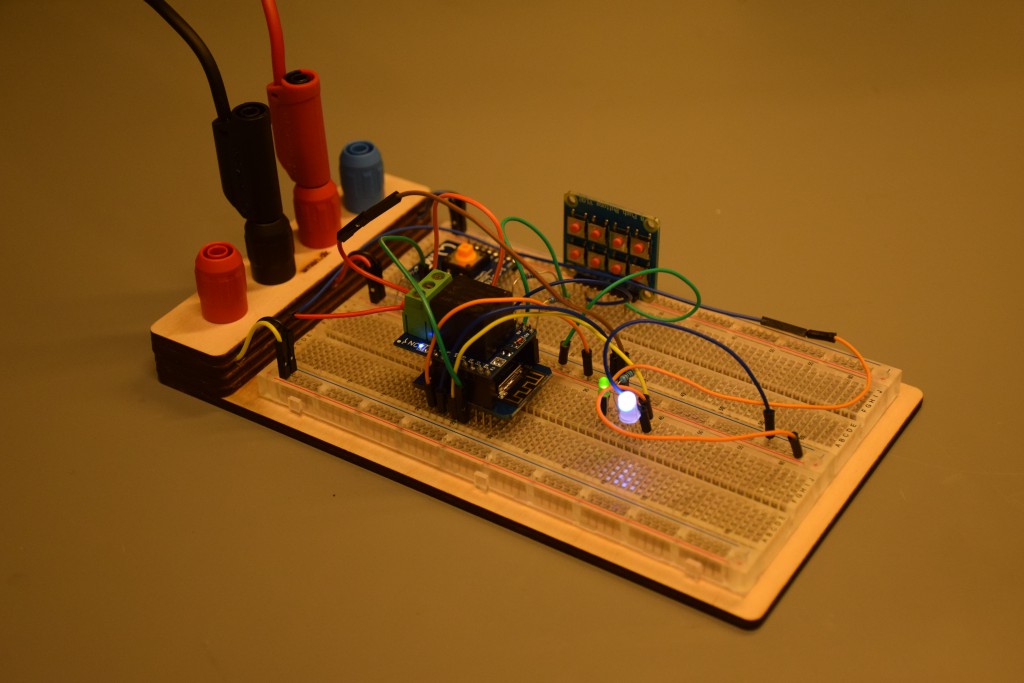
When writing the code it is not so easy to access the ESP8266 once it is mounted inside the lamp, so I made a quick and dirty test setup on my breadboard ( If you like the breadboard, check it out at https://www.thingiverse.com/thing:1842897 ).

Also the “stack” of the Wemos ProtoBoard, D1 mini and RelayShield is higher than the fan + activated coal filter, so it sticks out of the top, which I think is fine. All the parts do not need to be hidden away for the eye to see 🙂

The software is available at:
https://github.com/sman-dk/arduino/tree/master/solder_fume_lamp
Since the ESP8266/Wemos D1 mini has wifi capability future improvements of the software will of course be to make it controllable via wifi  đź™‚

DSC_0065DSC_0014

IMG_3547DSC_0055

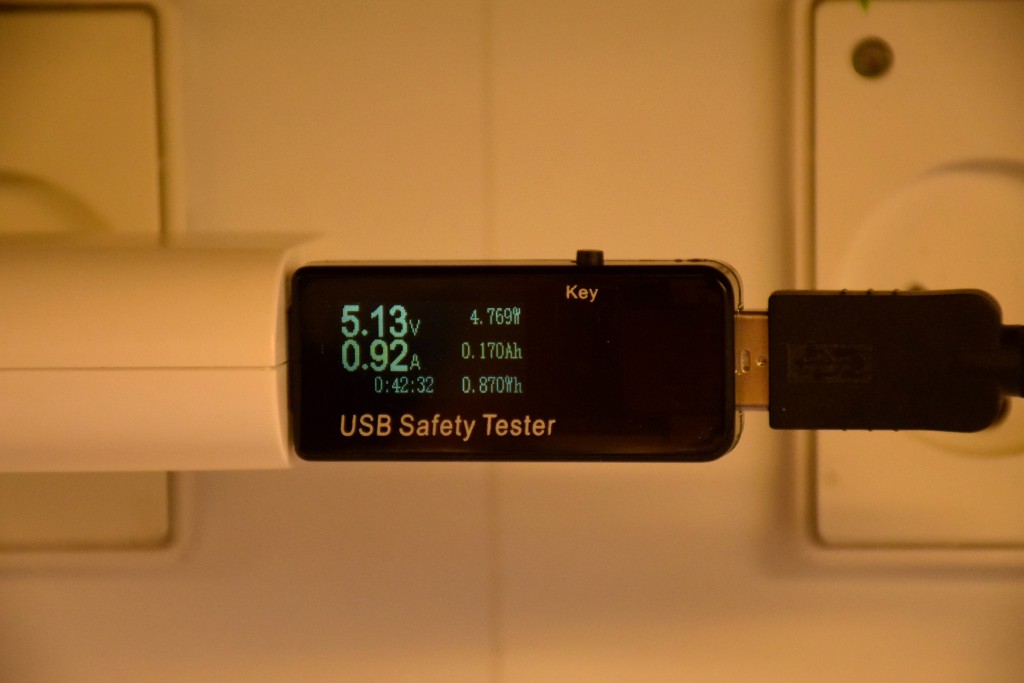
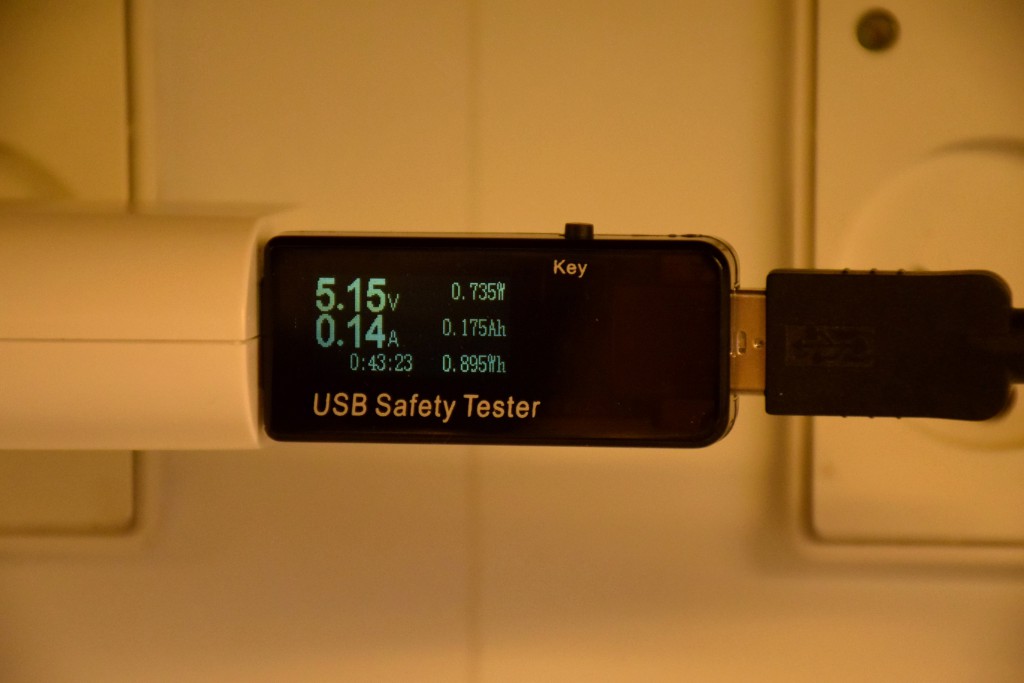
Power usage when the lamp and fan is active
Power usage when idle

Dual boot Ubuntu Linux 14.04 LTS on iMac with EFI boot

I just got a 27″ iMac (version 14,2) and had a hard time finding status reports online on how well it works with Ubuntu along side with OS X. Also it seems the guides online are not that updated and there are various ways to install Ubuntu – but which way works and gives the best result?. Below is my experience and how I got it to work.

tl;dr

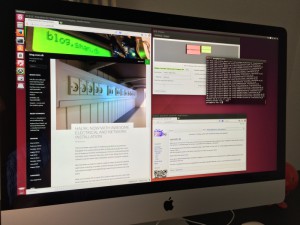
Besides a small issue with headphones audio, and installing an extra program for handling bluetooth HID-devices, Ubuntu 14.04 works very well with iMac14,2. Everything works out of the box (including the webcam, WiFi and HDMI via mini DisplayPort). In other words the result is close to perfect!
ubuntu_on_iMac

Some notes about rEFInd and boot camp

Some sites say that rEFInd is needed in order to boot Ubuntu on a Mac. As far as I can see those times are over.

Using Apples Boot Camp creates some legacy BIOS emulation for Windows and should have some pitfalls when using Ubuntu.

Bottom line I used neither rEFInd nor Boot Camp, and it works allright without.

Installing Ubuntu on iMac along side with OS X

Based on this guide.

The following was how I in may 2014 installed Ubuntu 14.04 LTS on an iMac 27″ (iMac14,2). During the installation you would need a keyboard and a mouse connected via USB.

You can see what version of iMac you are using with the following command (iMac14,2 for me):

OS X: sysctl hw.model

Ubuntu: sudo dmidecode -s system-product-name

  • Preparing a USB boot medium

In OS X: Download Ubuntu 14.04 LTS from a mirror close to you:

wget http://mirrors.dotsrc.org/ubuntu-cd/14.04/ubuntu-14.04-desktop-amd64.iso

Convert the iso. Otherwise the Mac apparently can not boot from the USB drive

hdiutil convert ubuntu-14.04-desktop-amd64.iso -format UDRW -o ubuntu-14.04-desktop-amd64.img

Insert your USB flash drive and determine what the device name is

diskutil list

Unmount the USB flash drive and write the .img file to the flash drive (replace N with the disk number from the command above. For me it was 1).


diskutil unmountDisk /dev/diskN
sudo dd if=ubuntu-14.04-desktop-amd64.img.dmg of=/dev/diskN bs=1m

  • Boot live Ubuntu and do basic testing

Before you install Ubuntu on your Mac, I recommend that you boot into a live Ubuntu and look around how well it works on the hardware you have (Select “Try Ubuntu without installing”).
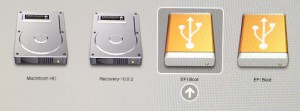
Boot options when holding down the option key. Shutdown OS X and turn on your computer again. During startup hold down the option key (normally marked alt and located between the ctrl and cmd keys left to the space key.

Ubuntu should now boot and you can do your testing. Reboot when done and boot back into OS X.

  • Repartition your disk

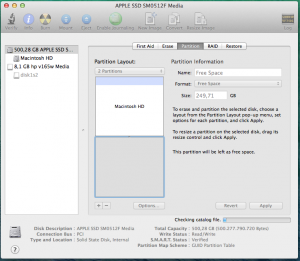
In OS X start Disk Utility. Choose your disk and create and adequate portion of free space by clicking the +, thus shrinking the existing partition. Apparently doing this with gparted from Ubuntu may result in OS X not being able to boot.
Disk_Utility

  • Boot live Ubuntu and install Ubuntu

It is important that you do not reboot your computer after having installed Ubuntu, since we need to modify EFI so that we can actually boot Ubuntu.

Shutdown OS X and boot, again holding down the option key and booting Ubuntu (Select Try Ubuntu without installing).

When Ubuntu has booted install Ubuntu. When asked about Installation type simply check Install Ubuntu alongside Mac OS X.

  • Post installation on live system

Once you have installed Ubuntu do not reboot just yet. Run the following in a shell:

sudo apt-get install efibootmgr
sudo efibootmgr

My output was:

BootCurrent: 0000
Timeout: 5 seconds
BootOrder: 0080
Boot0000* ubuntu
Boot0080* Mac OS X
Boot0082*
BootFFFF*

In order to get the computer to boot from Ubuntu the BootOrder parameter has to include Ubuntu (with the address 0x0080). This is done by executing the following:

sudo efibootmgr -o 0,80

Now you may reboot your computer and startup Ubuntu.

  • Getting the Apple Magic Mouse and Wireless Keyboard to work

Remember to turn on the mouse and keybard. For the mouse it helps to click it in order to activate it.

In the top right corner select the bluetooth icon and choose “Set Up New Device”.
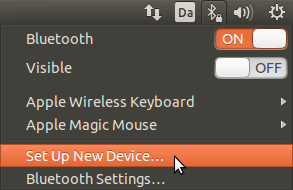
bluetooth_setup_new_deviceFor the keyboard I just selected it, clicked continue and entered the PIN it showed on the keyboard followed by the enter key and it worked. For the the Magic Mouse choosing the PIN 0000 seemed not to work, though as far as I could read on various sites it shoud, so I installed blueman.

sudo apt-get install blueman
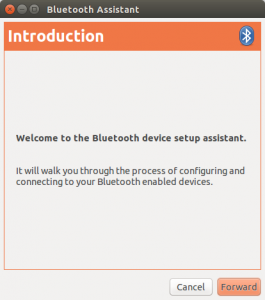
sudo blueman-assistant

The latter opens a wizard where it is possible to choose the mouse and use it as an “input service”.
bluetooth-assistant

  • Getting headphones to work (built in speakers works out of the box)

The build in speakers work fine but I could not get the headphones plug to work out of the box. I found many (not all too recent) guides suggesting everything from messing around with alsa-mixer to inserting stuff like options snd-hda-intel model=imac27_122 into /etc/modprobe.d/alsa-base.conf followed by alsa force-reload. None of it worked for me.

The thing that worked for me was using a small program called hda-analyzer from the ALSA project:

wget 'https://git.alsa-project.org/?p=alsa.git;a=blob_plain;f=hda-analyzer/run.py' -O run.py
sudo python run.py

The script downloads some more python files from the ALSA project and you get the following window:
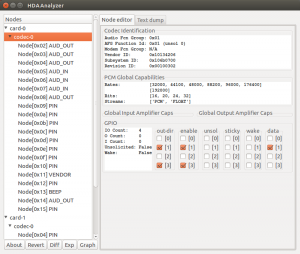
hda-analyzer_before

Choose Codec-0 and de-select the row [1] and select the row [2] as showed below (check the data column as the last column, or you will be unable to select it, it seems):
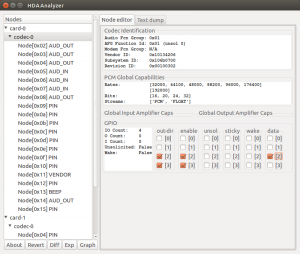
hda-analyzer_after

hda-analyzer changes what output that is used (if you want to go back to the build in speakers you need to click around in hda-analyzer again – it does not happen automatically :-/ ).

The setting for the audio play through the headphones plug is not persistan accross reboots. Since I only use headphones I want this to happen automatically when I log in. This is possible by choosing the Exp button at the bottom to the left. hda-analyzer then generates a little python script that can be used to set the current settings.
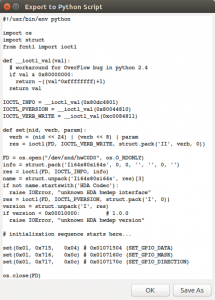
hda-python-script

Save the file and move it to e.g. /usr/local/bin/fix-imac-external-audio.py

In .bashrc add

/usr/bin/sudo /usr/local/bin/fix-imac-external-audio.py

with sudo visudo add (substitute username with your actual username):

username ALL = NOPASSWD: /usr/local/bin/fix-imac-external-audio.py

Now this is not an ideal solution – but it solved the problem for me (and should I have removed the headphones jacks and put them back in I just start a new shell). There is probably a much better location for the script, in order to only run the script once when Unity is started.

  • For non-US keyboard, getting <> key to work

From this guide.
I got a danish keyboard with a button containing the characters< and > between shift and the letter Z. However that is not what I get when pressing it (I get ½). Executing the following fixes that:

echo 0 | sudo tee /sys/module/hid_apple/parameters/iso_layout

This is not persistant accross reboots, so we need to run the following:

echo options hid_apple iso_layout=0 | sudo tee -a /etc/modprobe.d/hid_apple.conf
sudo update-initramfs -u -k all

  • Graphics driver

The default driver is not well suited for e.g. watching videos. In the Additional Drivers program choose the NVIDIA binary driver.

  • Booting into OS X

Hold down the option key at boot and choose Macintosh HD

  • Feedback

Feel free to give me feedback, e.g. by email. Especially I would like to hear about a better solution for the headphones fix.

I would love to see a good guide on Ubuntu’s community pages. Since I am new with Ubuntu on Mac I will let somebody more experienced on that topic write such a page 🙂

My files in the “cloud” – with OpenAFS

I, like many others, have more than one computer from which I would like to access my files wherever I am. Also small hard drives in laptops makes it impossible for me to have all my files with me when I am around. To solve that I used SSHFS for a few years. It is easy to set up but I experienced a number of issues, ranging from the lack of handling mobile clients properly (e.g. mobile clients do change IP’s when moving around and experience periods without network connections) to not handling file locking (e.g. GnuPG will not work properly without).

A better alternative
When I studied at Department of Electronic Systems at Aalborg University we did not collaborate and exchange our files via e.g. a local Samba server. Instead we had access to a distributed network file system called Andrew File System. AFS made it possible for us to access files from home, at the university, the login/job servers – in other words every internet connected computer with an OpenAFS client installed. For report writing in LaTeX and software code we used SVN on top of AFS or via SSH to a server with an OpenAFS client which worked great.

The distributed nature of AFS and the fact that I could not find a good way to access my personal files in an elegant way from multiple computers made me look into how to set up an AFS cell with OpenAFS. A cell is one or more servers within a name space for a given domain. E.g. the cell for the institute where I studied is available on the file system at /afs/ies.auc.dk. Other examples are Stockholm university which has /afs/su.se and CERN which has /afs/cern.ch.

openafs.dk – guides for setting up OpenAFS
I wanted to set up a cell for my personal files but found it a bit challenging and openafs.org did not have a good guide for newbies on how to set up a new cell (their technical documentation and the mailing lists are great though). Therefore I wrote a guide which I have also used several times when helping others to set up a cell. Besides the guide for setting up OpenAFS servers I have also made some instructions on how to install the OpenAFS client on the most popular operating systems. If you would like to put your files into “the cloud” (that term is so silly.. 🙂 ) consider using OpenAFS for the job.
Some of the features of AFS are:

  • Globally distributed file system An AFS-setup is able to scale across multiple servers – many of them if necessary. You can make a file globally available to other clients even outside your cell and the file paths are globally unique independent of the computer you are using.
  • Extended ACL‘s AFS gives extended possibilities for administrating access to folders compared to traditional Unix file permissions. Users can even make their own personal groups and include other users in them.
  • Secure Good integration with Kerberos for authentication. Connection between server may be (and normally is configured to be) encrypted.
  • Mature AFS has through its development through several decades achieved a high degree of stability and is used around the globe at many large sites including many universities and large companies.
  • Location independence You may access your files across the internet. A local cache on client computers lightens the load on both server an the internet connection of the client. If the client changes IP-address AFS handles this transparently in an automatic way because of the design around Kerberos (e.g. changing from 3G/UMTS to WiFi or a cabled network will not cause you to re-enter your passphrase for accessing AFS).
  • Platform indepence Many Operating systems are supported by the OpenAFS application; Windows, Linux, OS X, iOS, *BSD, Solaris and others.
  • File locks As opposed to what I have experienced with e.g. NFS, OpenAFS actually handles file locks very well.

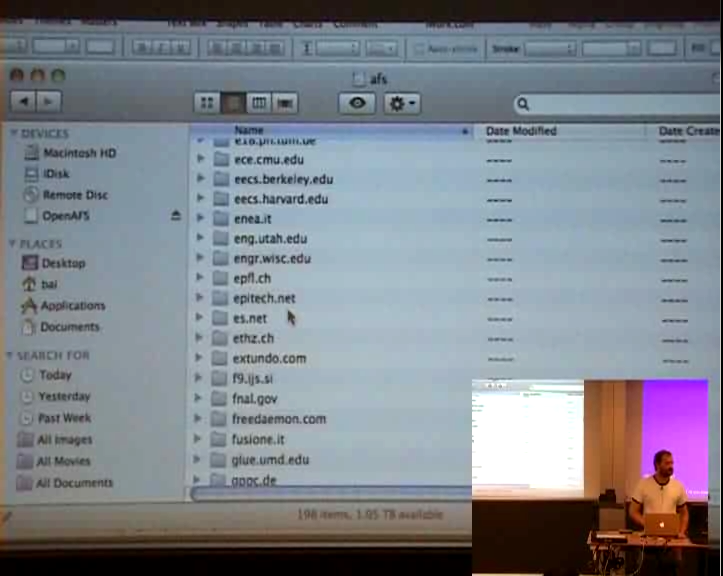
NJLUG talk about AFS
A few years ago at NJLUG we got Bo from the IT-Department, at the Department of Electronic Systems, to give a technical presentation about how AFS works. You can download the video from the presentation here from dotsrc.org. Be aware though that the talk, though very interesting, is in danish and lasts more than 4 hours.


POS printers and Python

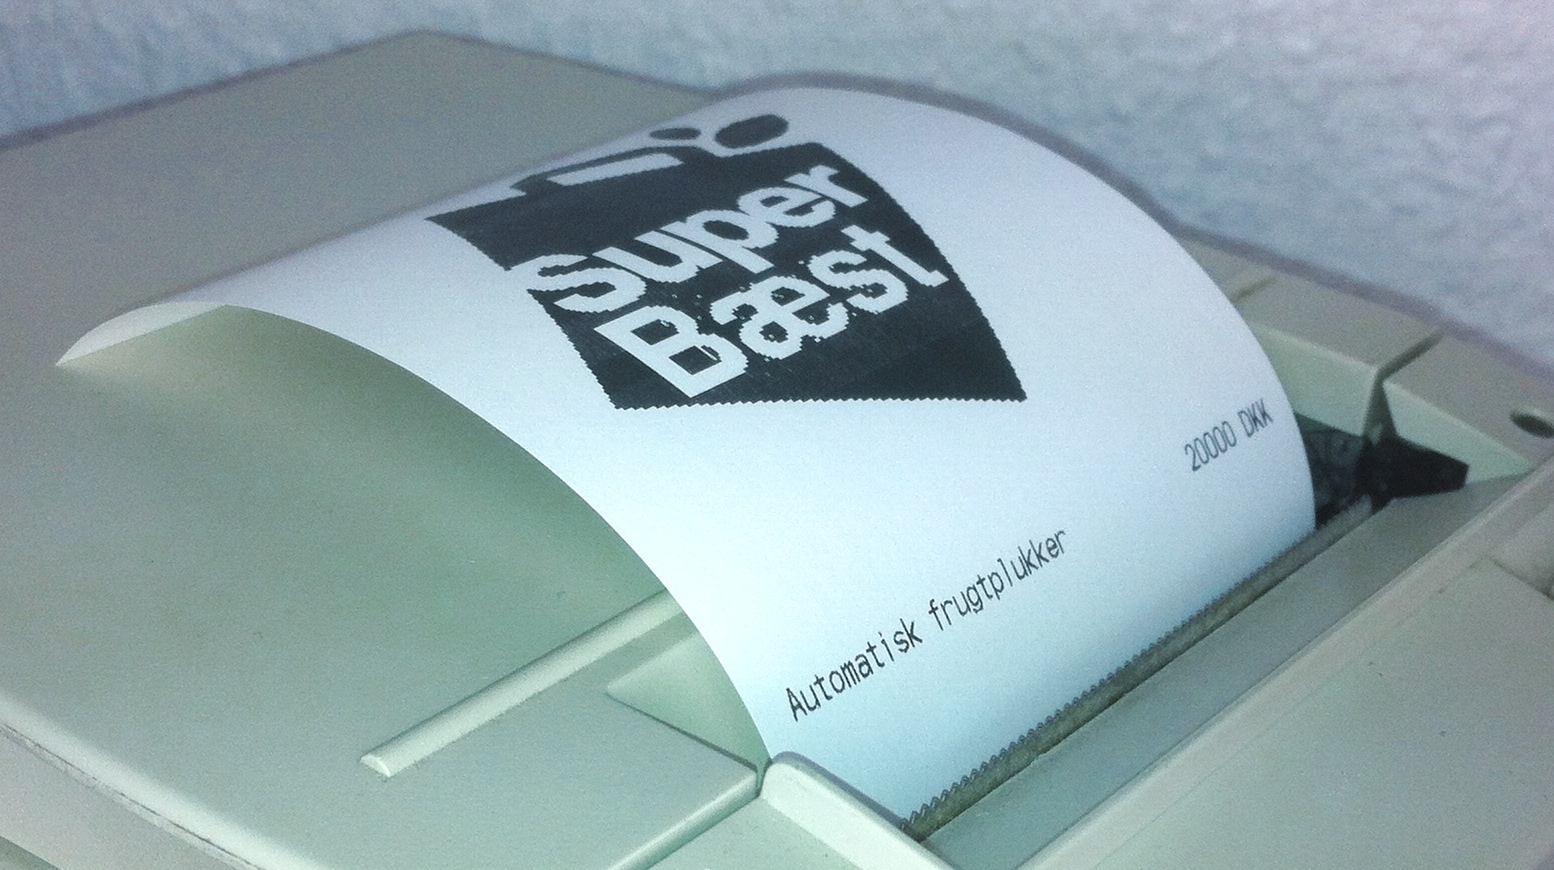
I had this old POS (Point Of Sale) receipt printer laying around for some time and thought it could be fun to play a bit with it. Printing plain text is simply done by sending it as characters via a serial connection. Cutting the paper is some ESC code which i found in a manual online. Printing images was a bit more tricky, since it is requires some specific codes, depending on how the dots in a vertical bar, equal to the height of a character, must be composed. I wrote a small Python module integrating the ability to print images, text etc.  since I could not find anything online simliar to what i wanted.

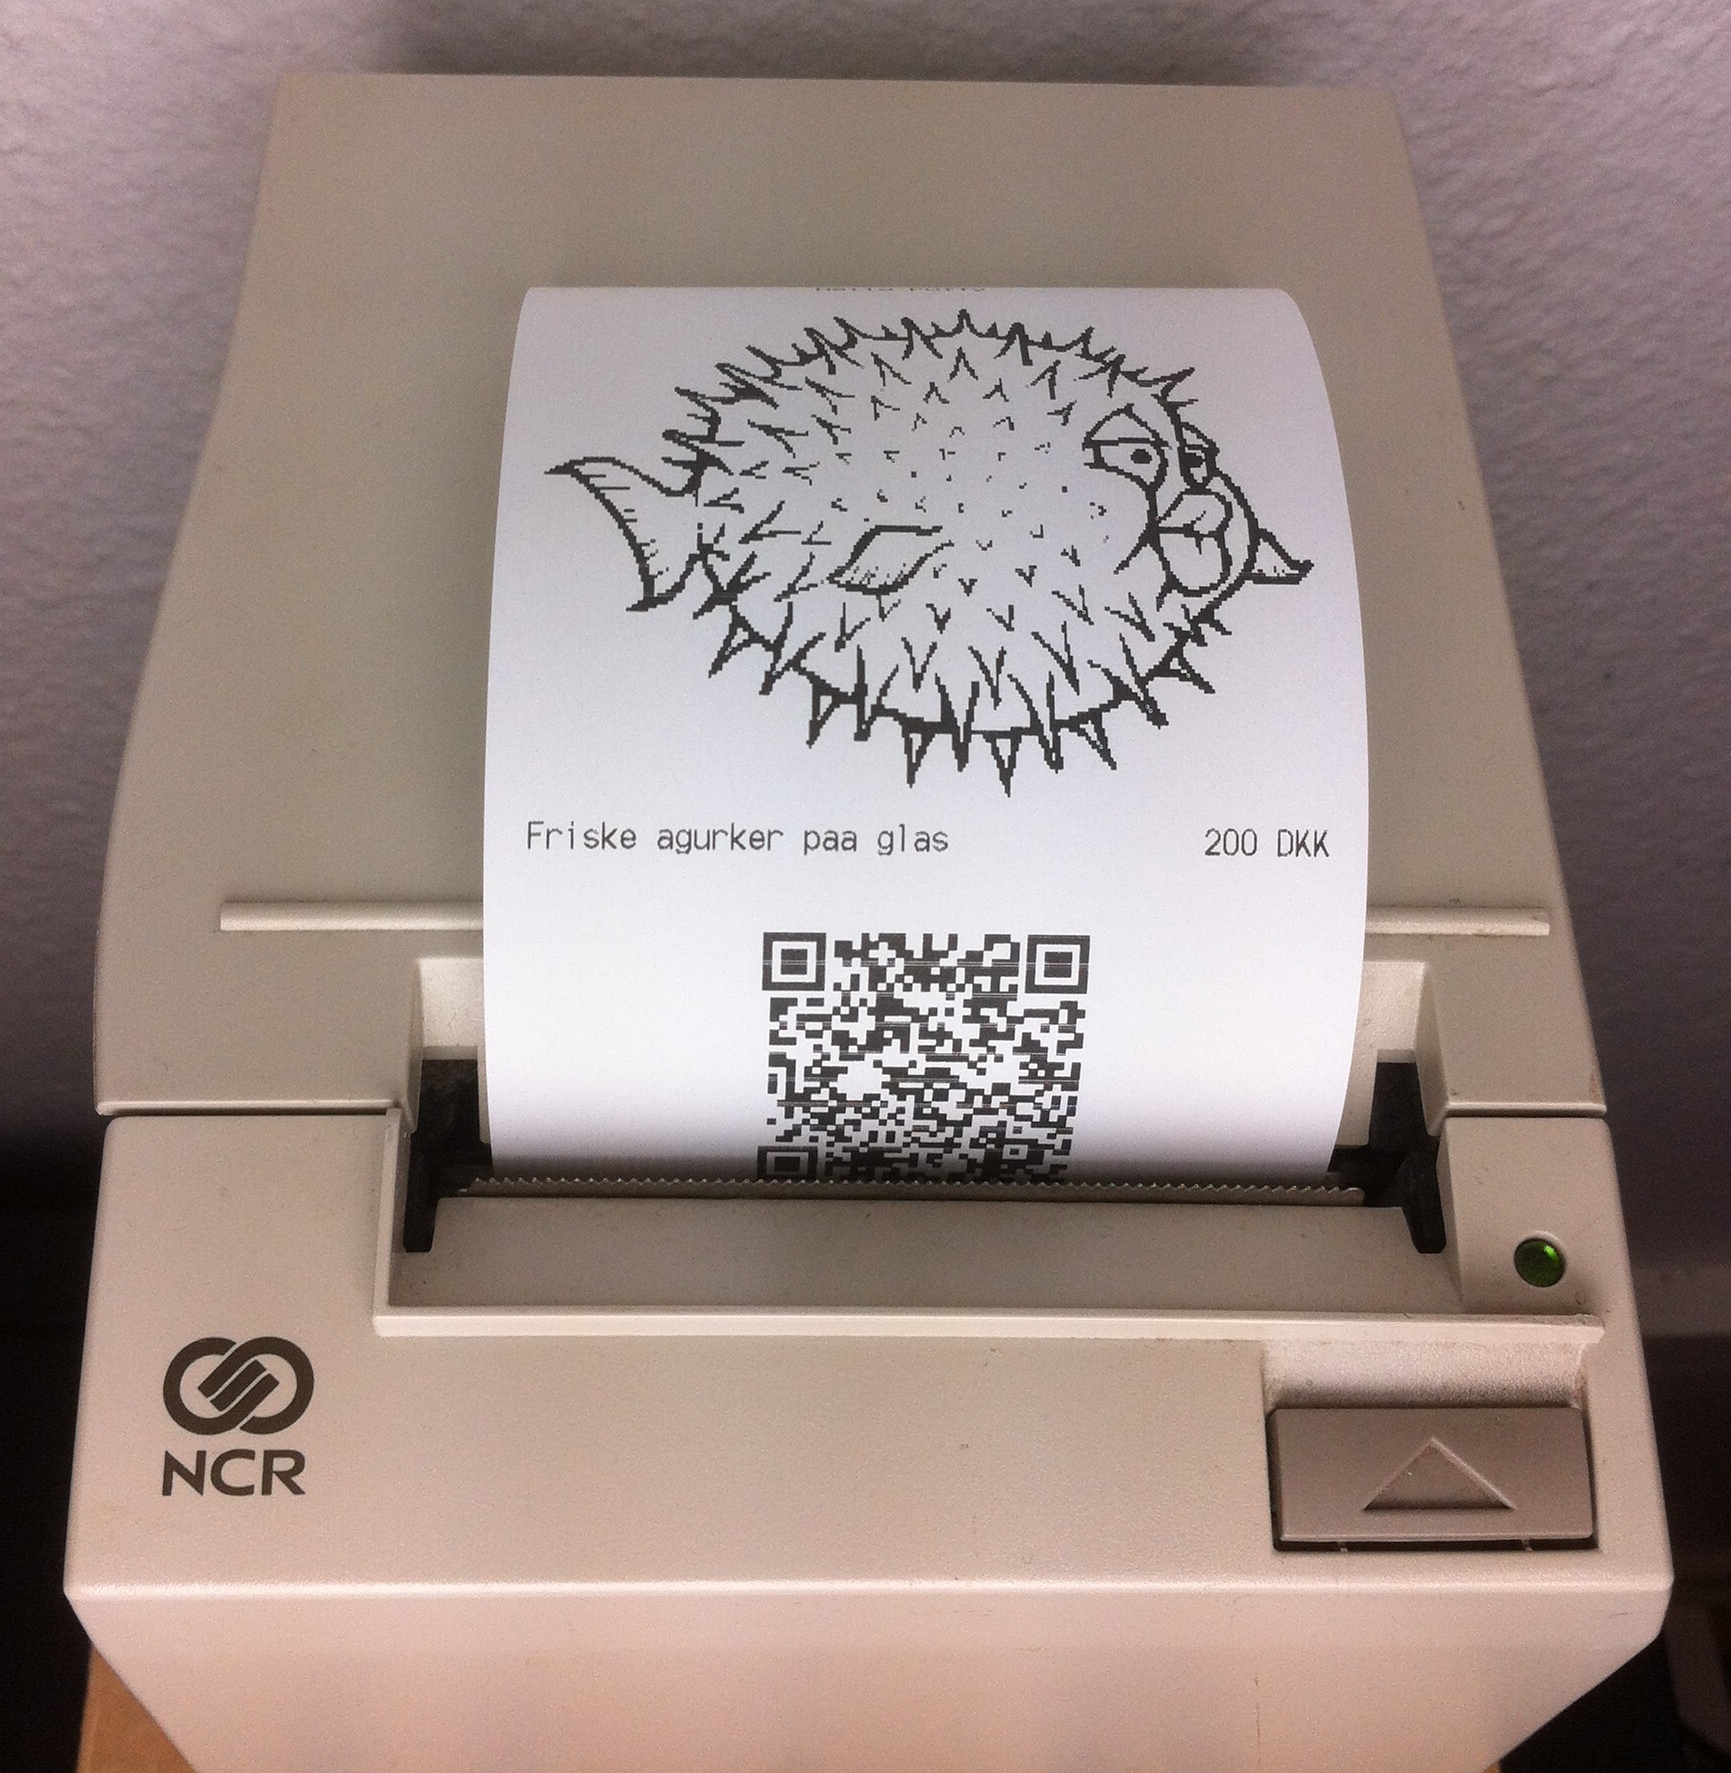
At the local hacker space (HAL9k) we have now received a large box full of used receipt printers, VFDs etc. and some of the members have asked for the module for printing images so I have uploaded pyPOSprinter to GitHub. It makes use of pySerial for communicating with the printer and Python Image Library for reading image files. The included example also shows how to use pyQRNative to print QR-codes (bar codes are soo last centory 🙂  ).

from pyqrnative import PyQRNative
qr = PyQRNative.QRCode(5, PyQRNative.QRErrorCorrectLevel.Q)
qr.addData(“http://www.sman.dk”)
qr.make()
im = qr.makeImage()
ims = im.resize((525,525))
from POSprinter import POSprinter
printer = POSprinter.POSprinter()
printer.write(“Hello Puffy\n”, align=”center”)
printer.lineFeed(2)
printer.printImgFromFile(“puffy.gif”, resolution=”low”, scale=1.0)
printer.write(“Friske agurker paa glas”, rcolStr=”200 DKK”)
printer.lineFeed(2)
printer.printImgFromPILObject(ims, scale=0.5)
printer.lineFeedCut()

DNSSEC and OpenDNSSEC

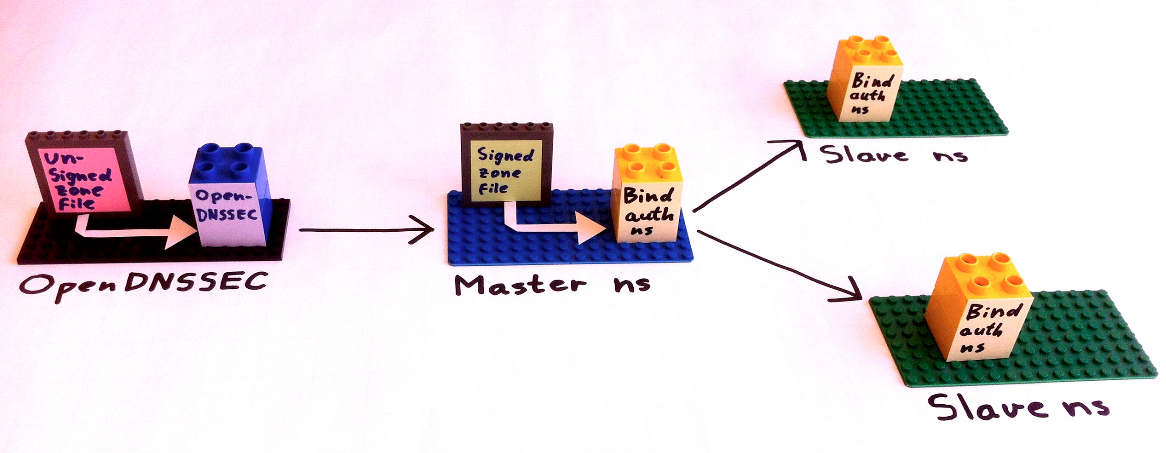
At this years The Camp Martin Toft and I held a talk about DNSSEC and OpenDNSSEC. A video of the talk, slides etc. are available here or on youtube. The talk is in danish but the slides and installation documentation is in english. Jump about 1 hour and 10 minutes ahead in the video if you already know how DNS and DNSSEC works but is interested in how to set it up with e.g. OpenDNSSEC.Lego illusttration of OpenDNSSEC signing zones

We have tried to be pedagogic about how DNSSEC works with slides spiced up with images of Lego and other fun stuff. Some examples are inserted here in the blog post.

Currently i have set a server up with OpenDNSSEC which takes care of zone signing. On my todo list is to check out Bind 9.9 Remember to guard over your private keywhich more or less can do what ods-signerd from OpenDNSSEC can do, but automatic key-generation, key-rollover, upload to parent etc. that ods-enforcerd takes care of is not implemented in Bind (yet?). dnssec-tools.org seem to have something that might do the job instead of ods-enforcerd – I have to try that out. If you have any experience with tools similar to OpenDNSSEC, whether that being the tools included in Bind or other tools, feel free to write a comment or send me an e-mail with your experience.

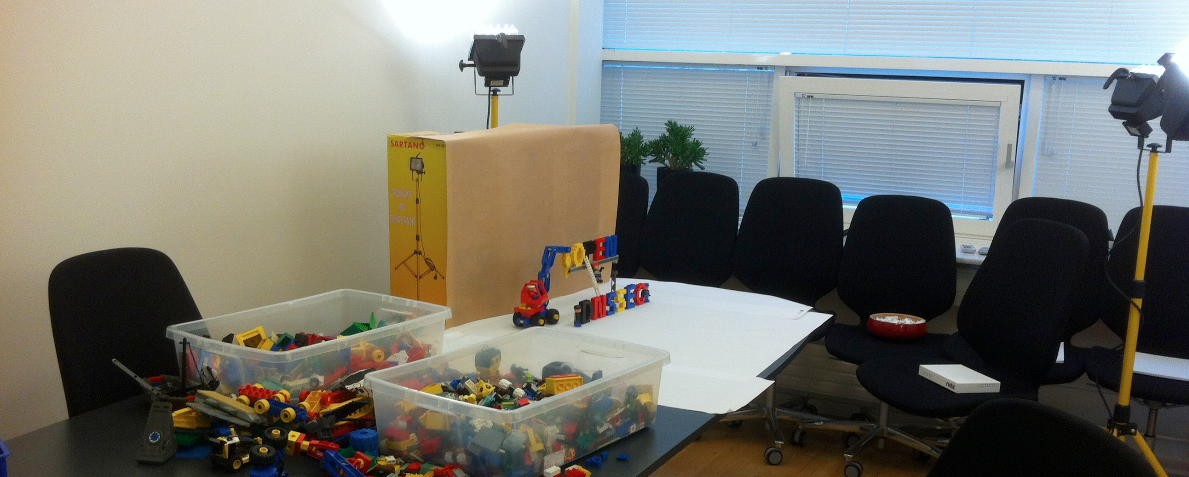
Preparing Lego slides in the office

Video recordings from The Camp 2012

The last few years videos from various open source events here in Denmark has been recorded but due to various reasons only few of them has made it online. Included in these events are The Camp where I this year volunteered to arrange this years recordings.

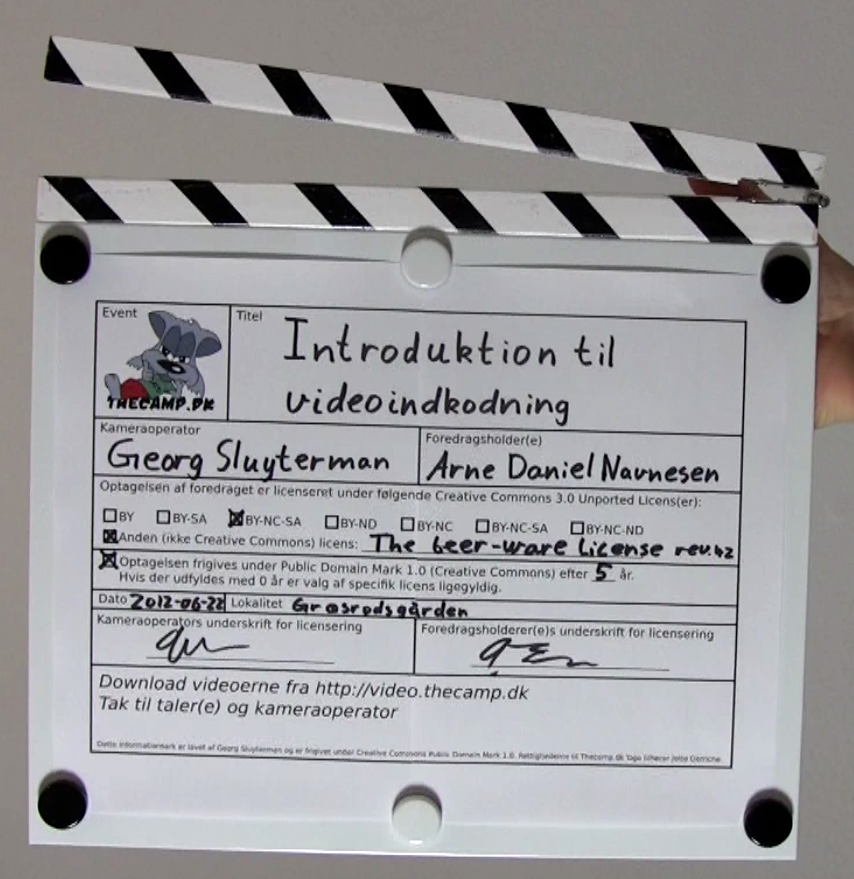
The goal this yeas has been to make it possible for everyone to record a talk (i.e. it should not be too complicated and well documented) and the encoding and publishing process should be made simple. I have tried to do it as much according to KISS as possible while still having some information about title of the talk, licensensing etc. included in the recording. The result is a piece of paper that is filled out and put on a clapper that i build, a recording made in its full length without further editing afterwards, and a small script that encodes the video.

Home made clapper

Documentation of the whole process is available here. The first video from yesterday is already online and it is my expectation that videos from the rest of the recorded talks will appear online during the coming week. Feel free to download them from:

video.thecamp.dk

To see which videos will be available see also this years schedule.

Update (2012-07-30): All videos are now online.

Using QR codes at HAL9k

At the hackerspace in Aalborg (HAL9k) we wanted to mark equipment etc. with various information such as the owner of the equipment, possible instructions on how to use it and other relevant information.

We decided to make something based on stickers with QR codes where the user is redirected to the relevant subpage on HAL9k’s website. One requirement was furthermore that it should be possible to change the name of a wiki page or possibly change to a new wiki/CMS system without putting on a bunch of new stickers, i.e. something more dynamic than a direct link.

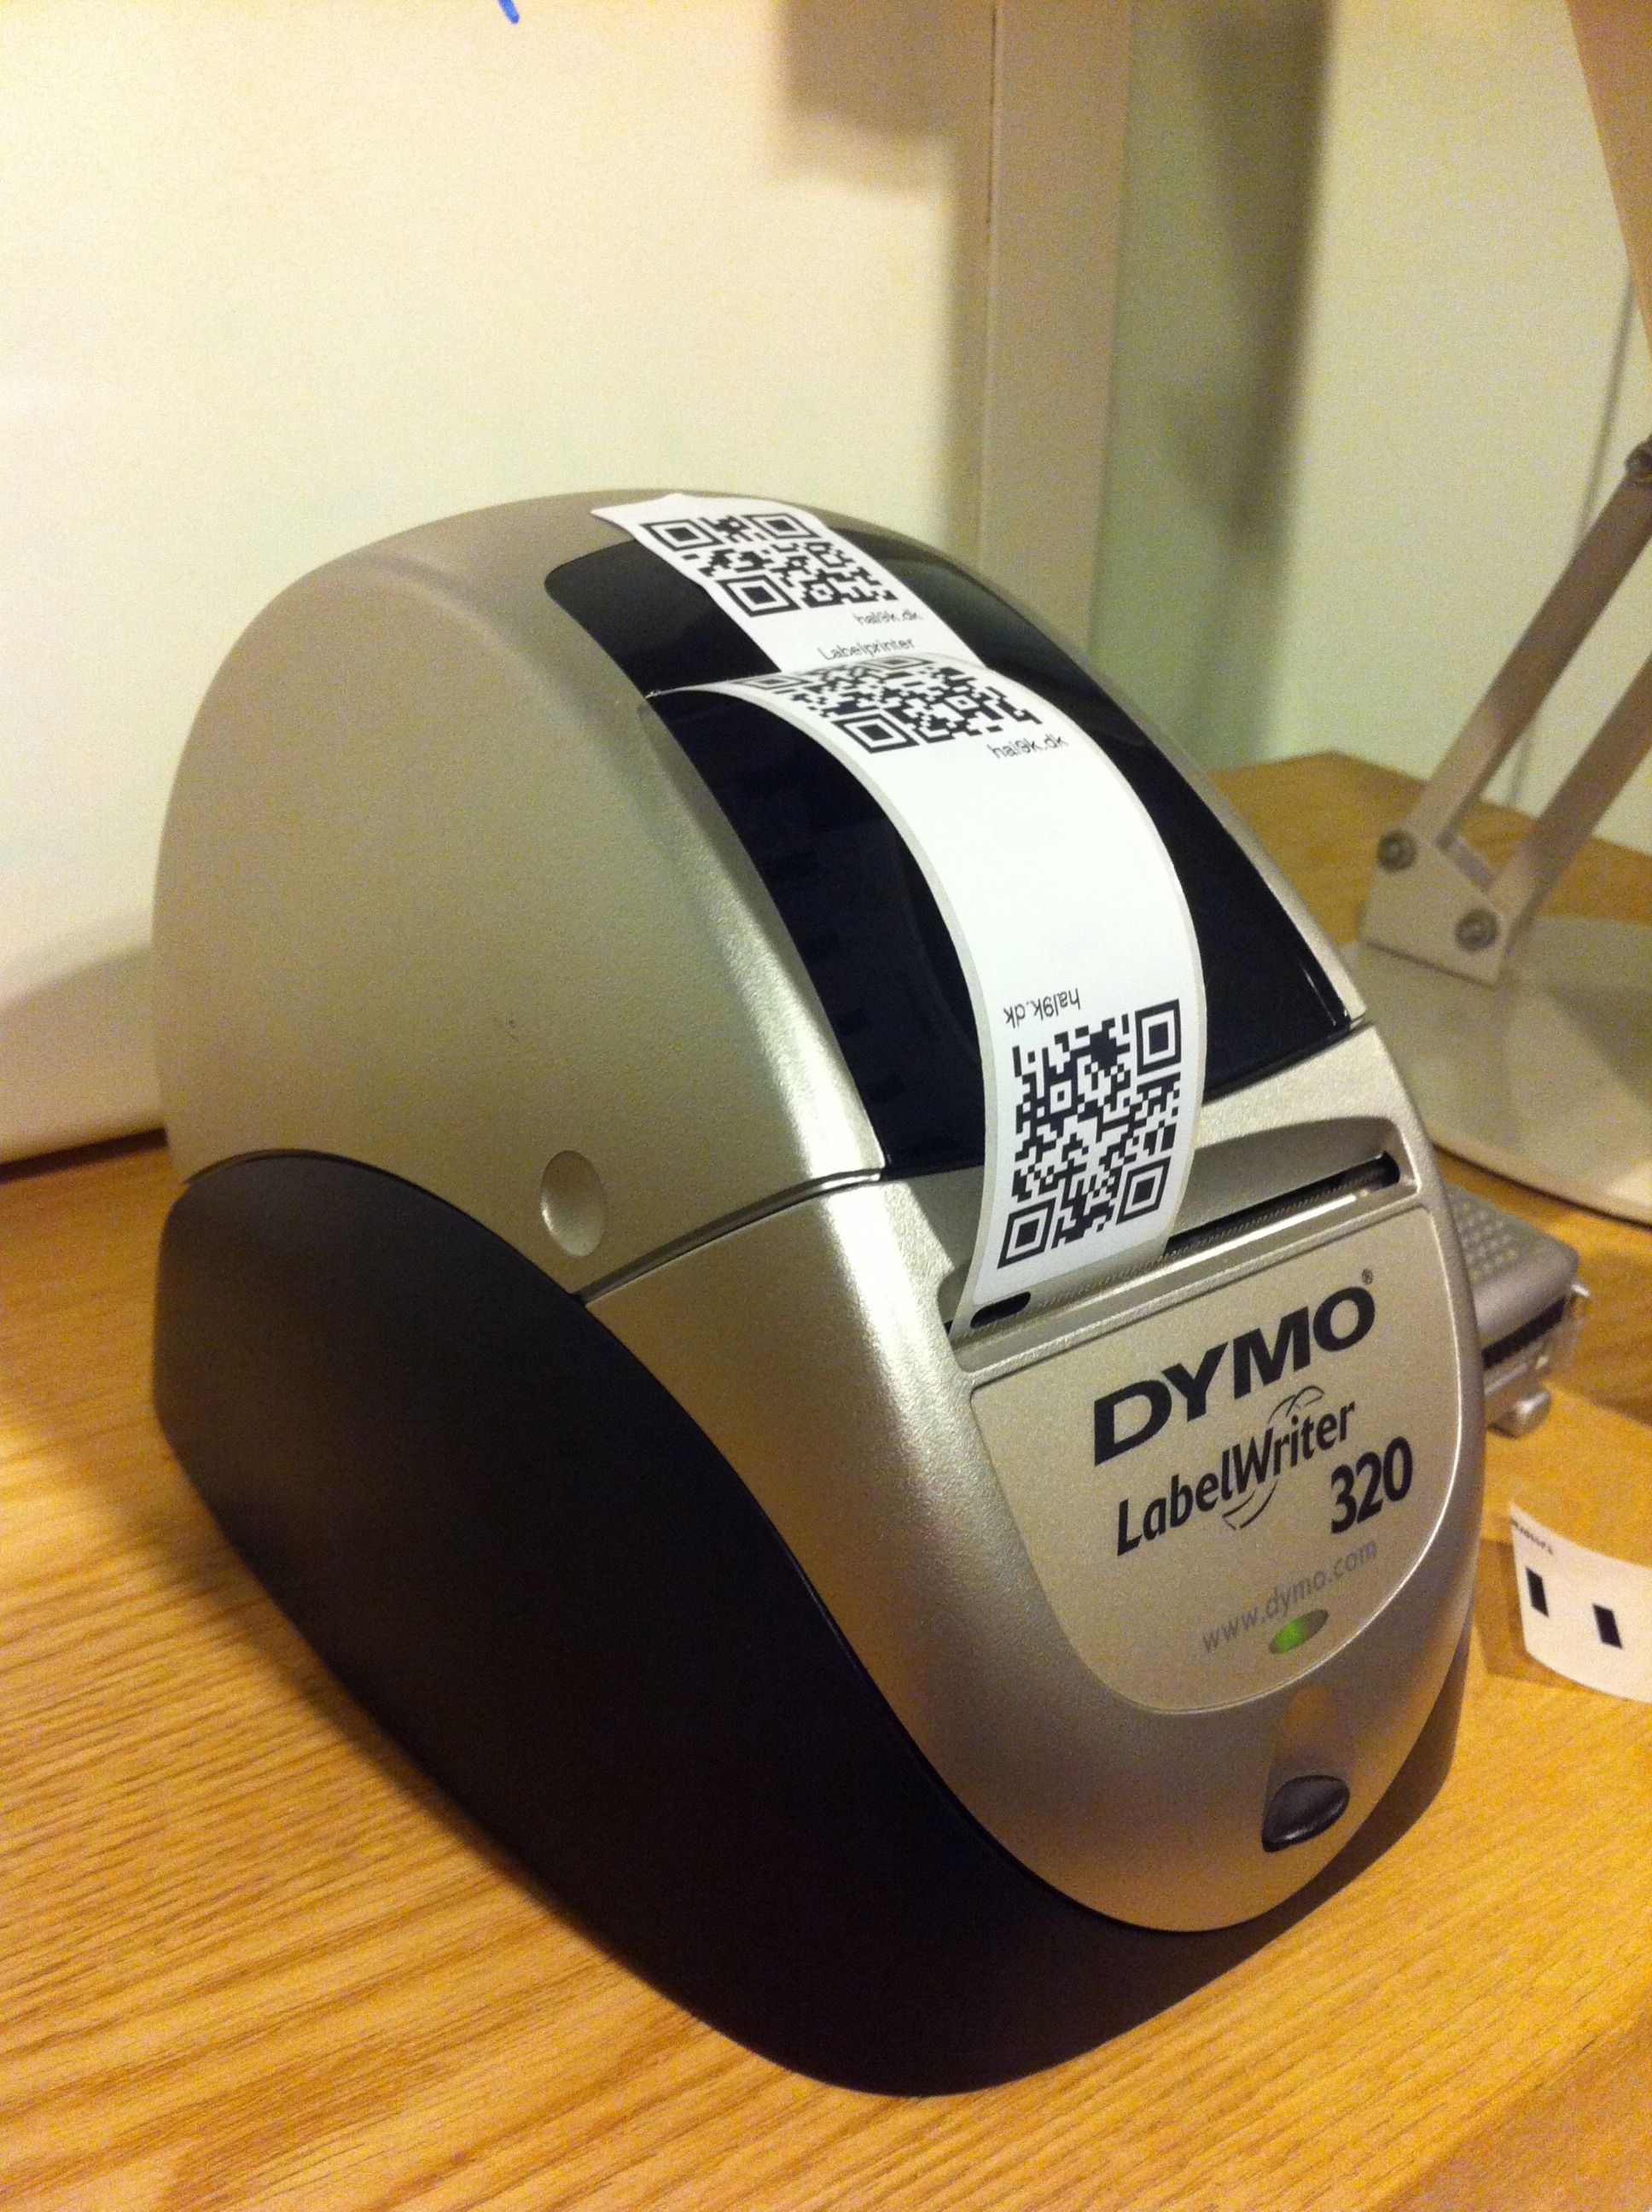
With regards to the stickers we ended up with a label printer attached to an Ubuntu Linux PC. We got 1300 stickers (resulting in 2600 QR codes) on Ebay for 350 DKK – enough stickers for the next foreseeable time..

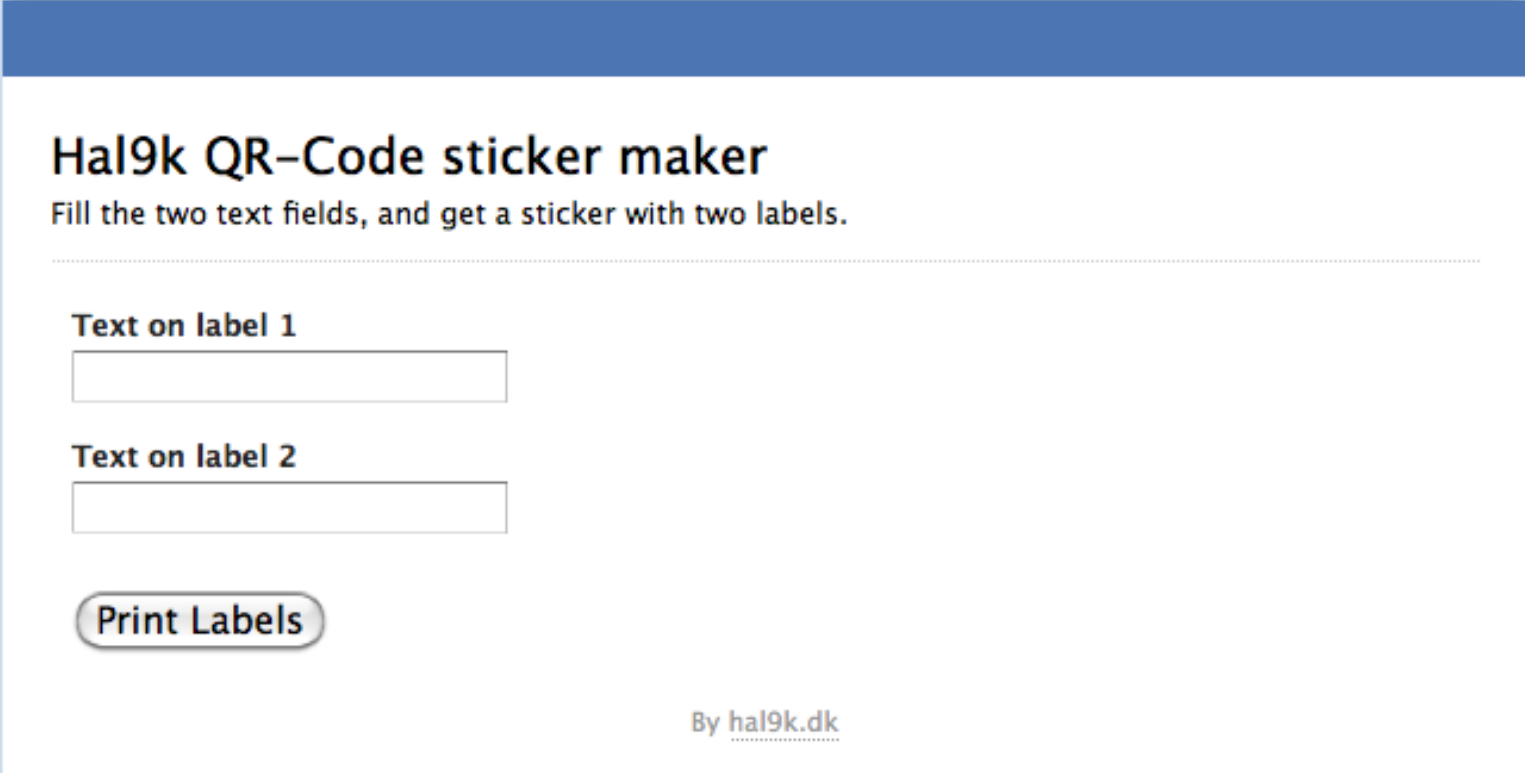
Mikael from the hackerspace wrote some PHP code that we run locally on an Apache webserver on the PC, which basically generates a QR code (well actually two since we have two individual QR codes per sticker in order to end up with the right size), adds some (optional) text, saves the resulting image to a file and then calls the lp printing command.

The label printer was made to work with CUPS by using the instructions on this site.

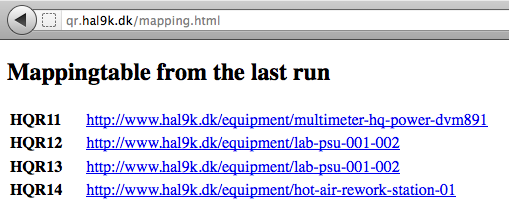
Now back to the requirement about the desire not having to put new stickers on all the equipment when we change wiki/CMS, rename pages etc. We solved this by letting the QR codes point to http://qr.hal9k.dk/HQRxxx where ‘xxx’ is some number. The webserver at qr.hal9k.dk automatically redirects (307 Temporary Redirect) to the relevant page. In order not to have a manually maintained list that nobody would update anyway i wrote a Python script that every 5 minutes goes through all the pages on the HAL9k wiki using the page hal9k.dk/qr as an index. Every time it sees the string ‘HQR’ followed by a number on a given page, a reference is made and a .htaccess file is then updated so that the user is redirected to the correct page. The mappings between the keys and the wiki pages, logs etc. generated by the script is available at qr.hal9k.dk.

So the end result, besides having fun making it all, is that now users can easily print labels and put them on equipment at the hackerspace. If they forget to create the wiki page the user is automatically redirected to this page for a reminder about just that 🙂

Videoer fra FOSS-Aalborg konferencen

Gik du glip af den nordjydske ‘FOSS Aalborg’ konference d. 4. juni, eller har du en umĂĄdelig trang for at gense nogle af oplægene?

Bare rolig der er håb forude. Videoerne er nu tilgængelige her:

mirrors.dotsrc.org/blivklogere/foss_aalborg/2008/

Du kan se hvem der talte om hvad pĂĄ:

foss-aalborg.dk

Tak til alle for en god dag. Jeg synes stemningen var god, og oplægene interessante og lærerige.

I forbindelse med video-optagelserne vil jeg gerne sige tak til:
Nikolai Beier (for at optage), DKUUG (for lån af kamera), mig selv (for redigering ;), Jesper Laursen (for at inkode videoerne), DotSrc.org (for mirroring) og selvfølgelig talerne (for at dukke op og tale).

Vi ses næste forår til FOSS Aalborg 2009.

Hej verden

Halløj. Jeg hedder Georg Sluyterman, og vil fremover skrive om open source / fri software og IT-Politiske emner.

For dem som ikke kender mig, sĂĄ studerer jeg elektronik (kommunikationsteknologi) ved Aalborg Universitet. Pt. arbejder jeg som unix systemadministrator hos Sonofon | Cybercity, og bruger min fritid i bl.a. følgende foreninger: IT-Politisk Forening, DKUUG, konferencen “FOSS Aalborg“, NJLUG og DotSrc.org (det tidligere SunSITE.dk).

I er velkomne til skrive (sobre) kommentarer, eller skrive til mig direkte per e-mail.